Major Updated Features and Benefits in QuickBooks
Desktop for MAC

Updated and improved features in QuickBooks Desktop for MAC
The Latest QuickBooks Desktop for Mac was launched in September 2021. It has both new and updated features for your business. If you are a MAC user and wondering if you should upgrade to QuickBooks Desktop for MAC 2022, here are the key features included in the accounting software that will help you make your decision.
Email Template
Using QuickBooks Desktop for MAC 2022, you can create customized email templates and use different subject lines and email bodies with them for all the forms you email to your customers. Next, you should select the email template to choose a date to send an invoice, sales receipt, estimate, or other transactions.
Automated Payment Reminders
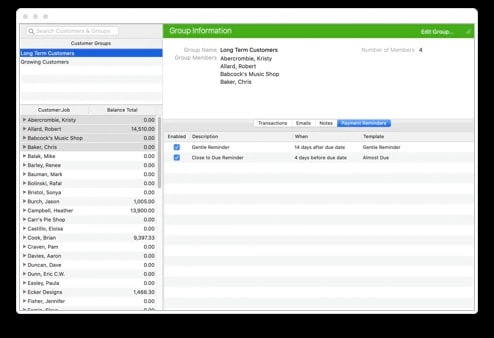
This feature will allow you to remind your customers of their invoices to be paid.
Set it up and QuickBooks MAC will notify you when the invoices are ready to be sent. To be double sure, you can review them once before sending them. Here is your step-by-step guide to using this feature.
- Open QuickBooks Desktop for MAC and go to Customers.
- Click on Payment Reminders and select Schedule Payment Reminders.
- Go to Customer Center, click (+), and pick a name for your group.
- From the Customer, go to the job panel and then select the customers you want to add to the group.
- Once you have added new customers to the group, press OK.
- Go to Customer Center, open the customer group, and click on the Payment Reminders
- Click on the Gear icon and select New Payment Reminder.
- Next, customize details like your reminder description and date to send the reminder then press OK.
Combine Multiple Emails
If your business requires you to send multiple forms such as invoices or statements to a particular customer – in that case, you can put them together into a single email rather than sending multiple emails. Here’s how.
- Go to the File menu and select Email forms.
- The forms you see here are the ones you’ve chosen to email at a later time.
- Choose the forms you need to send.
- Click on the checkbox for Combine forms to a recipient (customer) in one email.
- Click Send.
Credit Card Refunds
If you offer Merchant Services, his feature will let you refund credit card payments in QuickBooks.
- Choose the Sales Receipt /Payment you want to refund.
- Tap on the charge information button at the top of the form.
- Click on Refund Payment to process the refund.
e-Statements
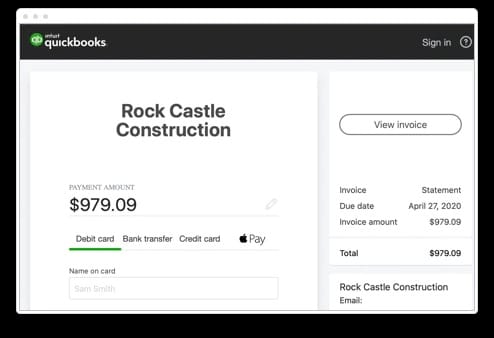
If your QuickBooks Desktop for MAC 2022 has QuickBooks Payments, this feature will let you receive payments from your customers for their invoices or statements online. They can make payments using a credit card or bank transfer. Note: Before you ask your customers to pay statements online, you’ll have to sign up or connect your account for QuickBooks Payments. Here is how you can use e-statements
- Go to the Customers menu and select Create Statements.
- Select your customers and statement dates and then click Allow Online Payments.
- Select Email as the mode to send these statements to your customers.
QuickBooks Desktop for Mac will create an online pay link in the body of the email. Your customer can select this link and will be sent to a secure online payment portal to provide their banking information, debit card, or credit card and make the payment
Steps to record payments and deposits
- Go to the Customers menu and select Record Merchant Service Deposits.
- Select the transactions followed by the record.
Note: If you are selecting records for the first time, QuickBooks accounting software will ask you to select the deposit and fees account.
Once you have successfully recorded the statement deposit, QuickBooks will apply the payment to the open invoices for that customer. You will be able to see the corresponding payment and deposit transactions in QuickBooks.
You may also read : login to a GoDaddy account
When you’re ready to send an email
- Select the email template you like from the email forms window for the different transaction types
- Click on the Gear icon if you want to make any changes to an existing template, then save a template as a default for a transaction type, create a new template, and finally reset or delete templates.
- Furthermore, you can add email tokens to personalize your message:
- Open the email forms or payment reminder window and select Insert Token.
- Select the new tokens you want to use – due date, transaction balance, company name, company telephone, company website.
- Click on Sent when you’re done
Find Company Files
- Now you can easily find your company files with the updated No Company Open Moreover, you can:
- Review all QuickBooks files stored on your computer and connected to external drives and networks.
- Search and find specific files, know their location in Finder, and open them in either single or multi-user.
- Expand or collapse the different file sections and sort them by selecting the column headers.
- Remove any files from the recent file section:
- Right-click on a file row
- Select Remove from the files list
- Filter the displayed files to the current QuickBooks desktop for the MAC version by selecting the box for Only QuickBooks at the bottom of the window.
One Intuit ID
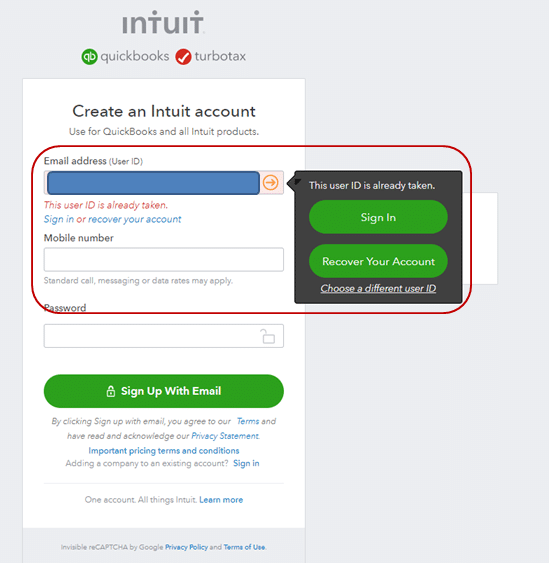
A new feature, Intuit One ID can be used to link your Intuit account ID to your company file. When you choose to upgrade your company file to the version, you’ll have to log in using your Intuit account. This feature will allow you to manage your account easily, view your customer purchase history, and handle services like Payroll, Merchant Services, e-Invoicing, etc.
- Open the QuickBooks menu and select Preferences
- Click on the Intuit Account icon
- Tap on Sign in and log in to your Intuit account using your credentials
- After signing in, select Manage Your Account.
- The above-given step will take you to the Intuit QuickBooks website, where you can easily manage your products and/or services
Print Report Row Colors
Another useful feature in the version, Print Report Row Colors will allow you to read your printed reports. When you print your reports, the row colors will by default match your on-screen reports. You can print report row colors using Light Mode or Dark Mode. You can also disable them while printing.
Sales Tax Codes
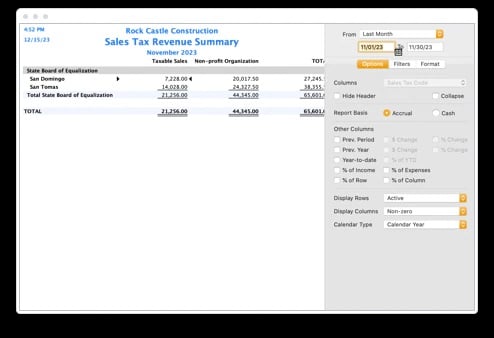
These are list items that enable you to stipulate the taxable or non-taxable status for your customers and items. QuickBooks automatically includes tax codes for non-taxable and taxable sales however custom codes can be added to fit your business. For instance, if your customer buys certain items from you and resells them, you can use the default sales tax code “Non” to label him as non-taxable in general, or you could assign a sales tax code such as “RSL” for resellers to be more specific. How you manage your customers and products is completely your decision, but with sales tax codes you can be broad as well as specific. Here is how you set up sales tax codes
- Open QuickBooks Desktop and go to the Lists
- Select Sales Tax Codes.
- Click on the add (+) option and open the New Sales Tax Code
- Put in your code manually in the Code field. (e.g. OOS for out-of-state sales, LBR for labor services, NPO for non-profit organizations, GOV for sales to government offices (non-taxable), WHL for wholesalers, RSL for resellers)
- If the sales tax code created by you is taxable, click on the checkbox next to Taxable
- If the created code is non-taxable, leave the checkbox unchecked.
- Include a description for your sales tax code and hit Next if you want to add another sales tax code.
- Press OK
Restore Backup Files
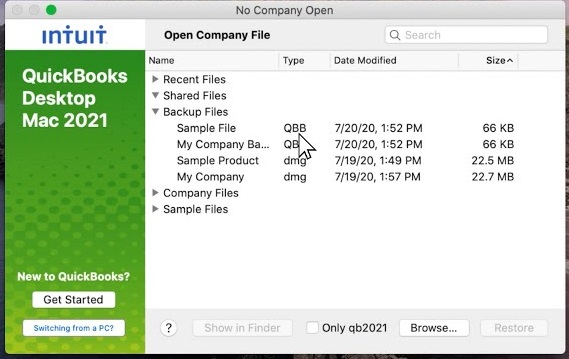
An updated feature, Restore Backup Files will now let you restore a backup file from the No Company Open screen. Here’s how you can use this feature:
- Click on QuickBooks Desktop for Mac
- Go to the No Company Open screen and select the Backup File you’d like to restore.
- Tap on Restore and review the company file information and attachment library that has to be restored and select
- QuickBooks Desktop gives you the option to review and/or change the file name and location
- Click on Save once you are done.
QuickBooks Desktop for MAC will restore your company files and re-associate your attachment library if you include one. Once the backup process is complete, you can log in to QuickBooks Desktop.
Now when you know about the major features and benefits that have been added to the latest QuickBooks Desktop for MAC 2022, you can make up your mind if you should go for an update.


